Re: [新聞] (WIP) Luca Elia: Jockey Club II
2017.05.01
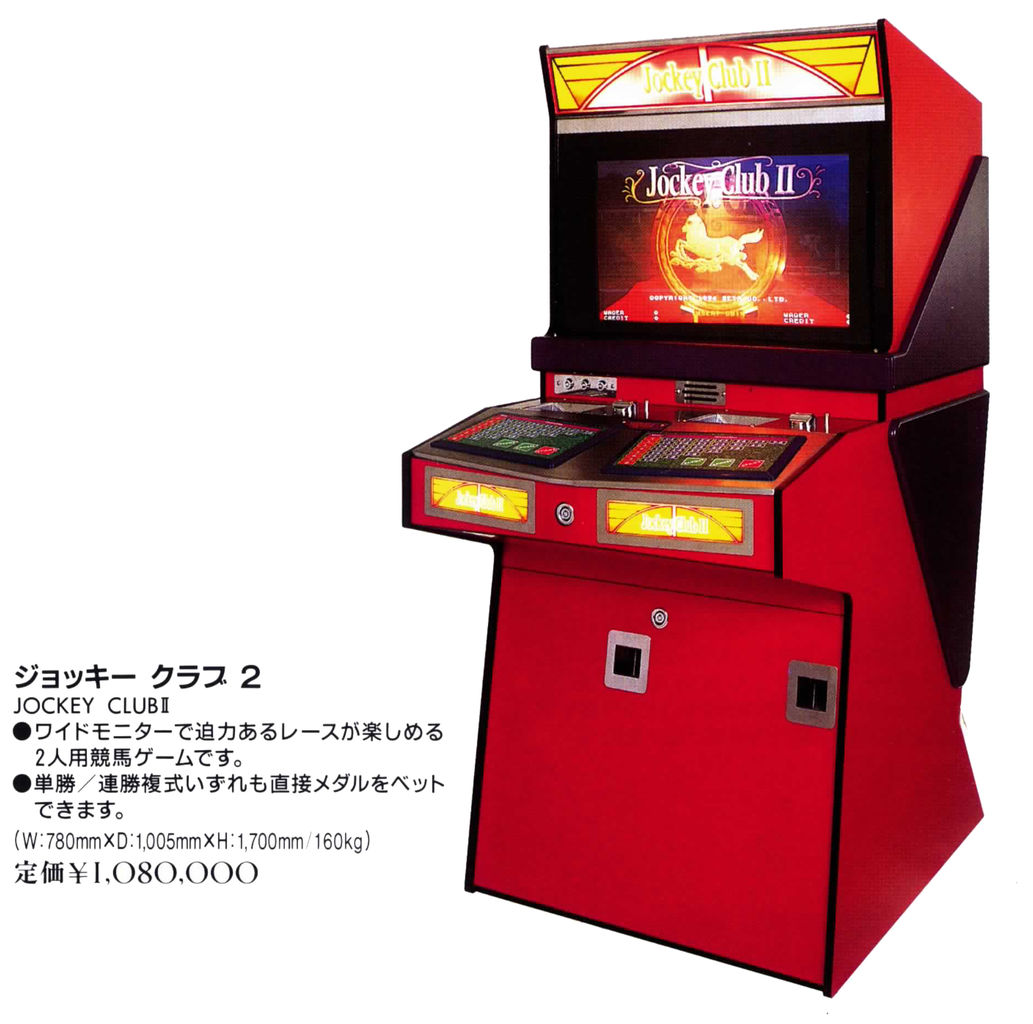
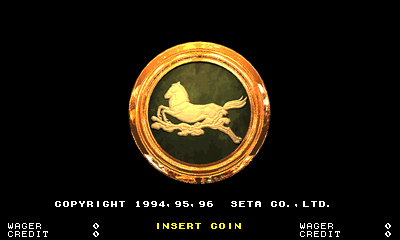
Few will remember the Dark Horse bootleg I worked on in 2005. Anyway, that
horse betting game was based on an original title by Seta, pictured below:
http://www.lucaelia.com/images/mame_snaps/jclub2/jockey_club_ii_cab_sigma.jpg

Back then the original hadn't surfaced yet, but a couple of years later
Gerald (COY) provided dumps of the original roms. An additional dump was also
provided by ANY in 2014 (none were Visco licensed as the flyer would imply,
by the way, unlike the original Jockey Club in seta.cpp).
At any rate, they never really were devoted enough attention to transition to
a working state. I guess the fact that the bootleg worked took away some of
the challenge, too.
0. Hardware
The dumps came from two types of PCBs and several software revisions, sign
that the game had good commercial success.
The older hardware PCB was based on the ST-0020 Seta custom for graphics,
which I emulated around the same time for Mobil Suit Gundam Final Shooting.
Plus an ST-0016 for sound (Z80 cpu + sound + video, Dox's work). The other
ASICs are ST-0013 (exact function unknown) and ST-0017, which may be related
to I/O. The older PCB should look similar to this sample:
http://www.lucaelia.com/images/mame_snaps/jclub2/jockey_club_ii_pcb.jpg
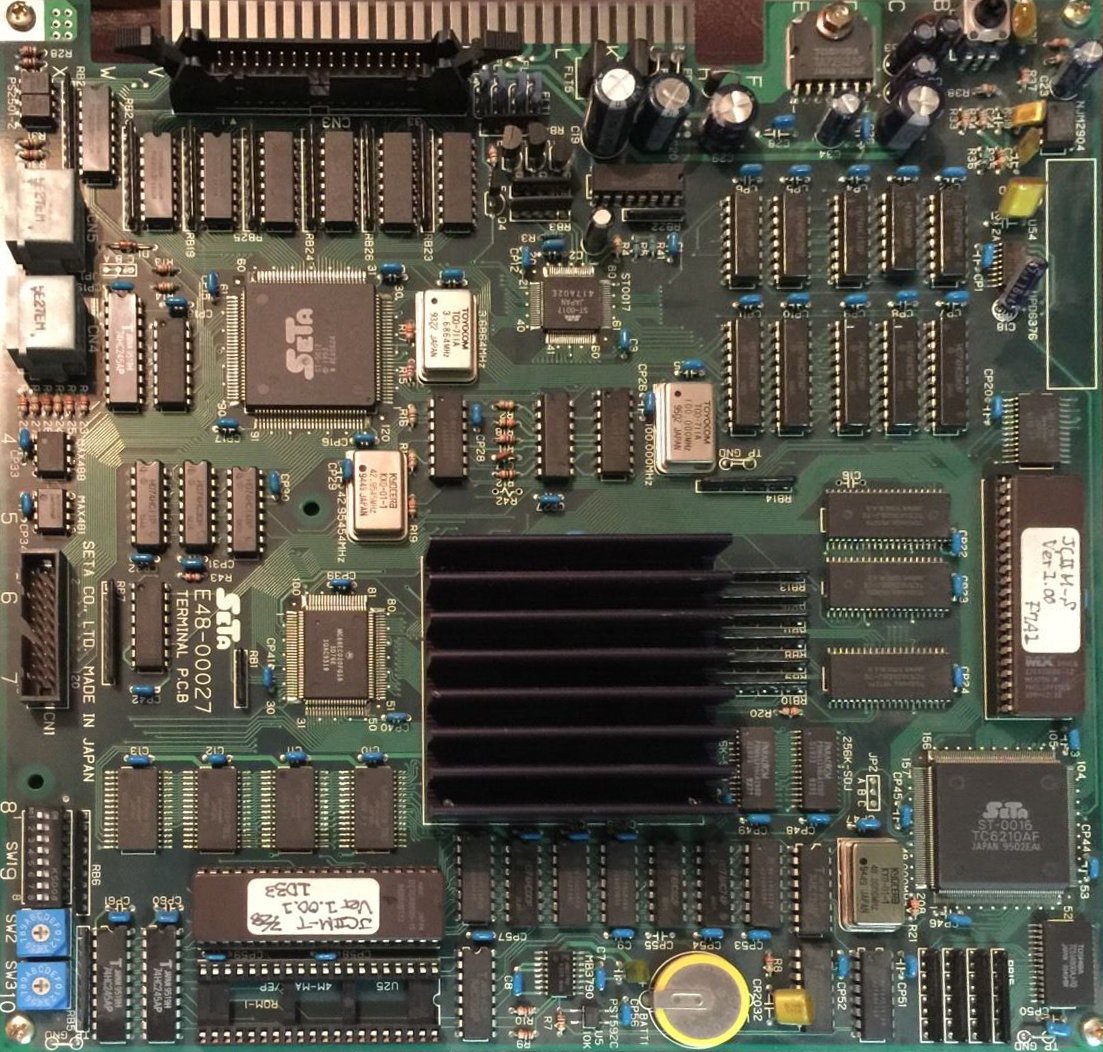
Older PCB: ST-0020 (under the heatsink) + ST-0016
The newer PCB instead used an ST-0032 chip, an updated version of the ST-0020
that includes sound capabilities, thus doing without the ST-0016 and reducing
the cost.
The ST-0020/ST-0032 provides some nice zooming sprites, which the Gundam game
above uses extensively (see gdfs in ssv.cpp). This game not so much, zooming
isn't actually used i.e. the horses are pre-rendered at each size in the
graphics, as Dark Horse shows.
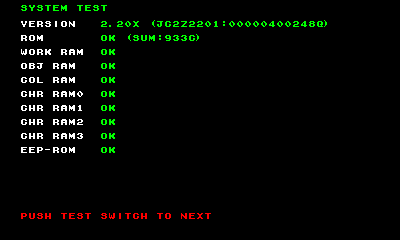
1. EEPROM
Up to now you were greeted with an ID Error message when running either of
the two existing sets on the older hardware (jclub2o, jclub2ob) and with
Broken Configuration on the new hardware (jclub2). What those messages
actually mean though, by looking at the code, is that the software is not
happy with the data found in the EEPROM. The latter chip in fact holds
programmable non-volatile data such as the game configuration.
But, as a form of protection, it must also contain an ID string supported by
the software for it to boot.
Now, we do have dumps of the EEPROMs from both PCB revisions from two
specific game versions. But for newer hardware sets, most will not boot since
the dumped ID is from a later game version. For the older PCB, though, I
found there was another problem, a subtle difference between the Seiko S29290
EEPROM chip used and a standard 93C46-compatible serial EEPROM.
So the 1st thing I did was to add support for this variant with the help of
the datasheet, which fixed the EEPROM check in the self test screen.
2. Software Revisions
Thus the 2nd step was to split the existing sets properly, by hardware and
software revisions. As I said the ID is tied to the software version so an
earlier revision won't be able to boot with an EEPROM from a newer game
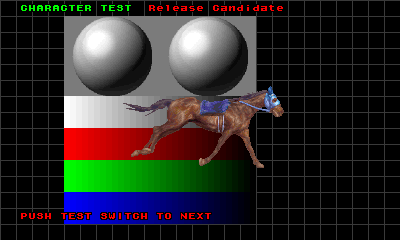
version. It turns out we have roms for 10 (!) versions of the game, including
a prototype (Release Candidate):
Older hardware: v1.00 ('94) v1.01 ('95) v1.10X ('96)
v1.12X ('96) v2.03X RC ('97)
Newer hardware: v2.00 ('96) v2.01X ('96) v2.04 ('97)
v2.05 ('97) v2.20X ('98)
Versions ending with an X were supplied by Seta as smaller upgrade ROMs. The
board has an empty socket near the main program for this purpose. The program
jumps to the updated code at boot when it finds the magic "JC2X" string at
offset 0x3fc in their ROM.
3. Sound
I tackled the ST-0020 + ST-0016 hardware first, since both the video and
sound chip are already emulated. Past the Broken ID message lied.. a Sound
Down error.
3rd step was thus hooking up the ST-0016. Easy, as I could lift the
communication with the sound CPU (latches and a status register) and its rom
banking from another driver. I only had to adapt the handlers for a 32-bit
bus (jclub2 uses a 68EC020).
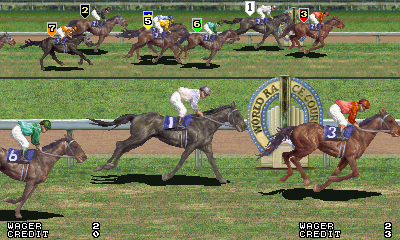
4. Backgrounds
This got me in-game but there actually were no backgrounds... here the
bootleg, which runs on a more traditional sprites + tilemap arrangement (or
does it? I have to revisit that assumption), provides an handy reference of
what should be going on when things are working properly.
So the 4th step was to have a second look at the ST-0020 as it probably could
produce some scrolling layers. The other possibility being they came from the
ST-0016 which has sprites as well... a possibility quickly debunked as its
video registers were untouched.
In the end I found the ST-0020 is capable of handling 4 tilemaps, yet
curiously the Gundam game does not use any of them (all registers are set to
0) and resorts to a separate tilemap chip (the ST-0009, probably). The
slightly more tedious work was to attain correct colors as they're handled
differently than in the bootleg:
http://www.lucaelia.com/images/mame_snaps/jclub2v203/0000.png
Priorities need some further work, so all the games have been marked with
imperfect graphics for now.
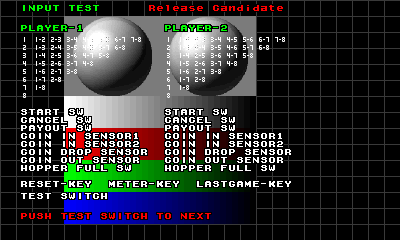
5. I/O
The 5th step was finalizing all the inputs and outputs, which were already
partly worked out and mapped differently than in the bootleg (the latter is
in fact based on some newer game version, allegedly v4.00). These games use
two keyboards with 39 keys each, two hoppers (which needed adding), three
sensors per coin slot, three coils per player, battery sensing (added), 4
internal revolving keys, service doors etc.
To help me out debugging this part I created layout files (for the original
game and for the bootleg) that provide clickable on-screen keyboard(s) and
internal inputs. I used this video of the controls as reference:
https://www.youtube.com/watch?v=IU8dWQhBmT8
(I think these are cheaper generic replacements.
The Sigma cabinet at the top of this post has proper keyboards)
Anyway you can see the keyboards and internal keys state, rendered by MAME
under the emulated screen, below. They allow a much more user friendly
control:
http://www.lucaelia.com/images/mame_snaps/jclub2v112/0004.png
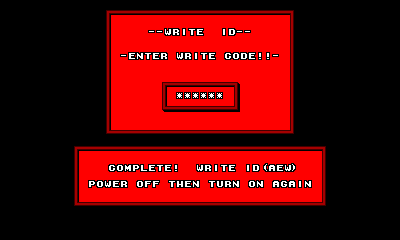
6. Writing the IDs
The 6th step was investigating if it was possible to generate valid EEPROM
data for all the software revisions. Otherwise only few sets would have
worked with the available EEPROM dumps. This was already noted in the driver
comments.
Basically through key combinations (not officially documented, I imagine)
it's possible to trigger a Write ID message that rewrites valid data in the
EEPROM, at least for the earlier versions. Additionally there's a key
combination for an ID that enables to change the type of monitor connected.
So I went back to the ST-0020 and added some minimal support for switching
resolution, and updated the layout files to let the user select what monitor
aspect ratio to use (5:3 - wide, 7:5 - normal).
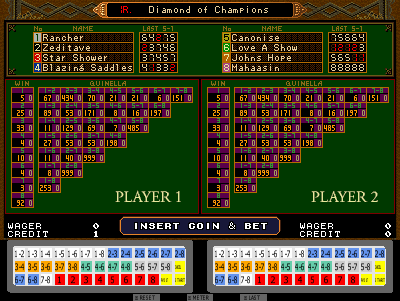
7. Vender Codes
Unfortunately producing a valid EEPROM becomes more difficult in the newer
versions. By at least v1.10 they introduced the concept of Vender Codes, a
secret code to input after the key combination at boot to unlock writing the
ID.
The 7th step was thus analyzing the code for inputting and verifying these
vender codes for each of the 10 sets, in order to generate valid default
EEPROM files. Fortunately these codes can be found in the roms with minimal
effort (the code to handle them is just shifted around in the rom).
Each code is a string of up to 8 hexadecimal digits that can be input
pressing the start button + one of the numerical keys i.e. 1 through 8. Key
"7-8" for hex digit A. Start + any other key for hex digit 9. Any other key,
without start, for hex digit F.
I found each code is actually tied to a configuration identifier, so they
produce different settings and features (probably to comply with the target
market legal regulations? these are gambling games after all). For instance
some codes unlock more options in the operator menu, such as the aspect ratio
of the monitor and betting limits. Some hide the Jockey Club II title from
the attract screen (for whatever reason) and so on. I tried to pick the code
providing the highest configurability and the best features.
http://www.lucaelia.com/images/mame_snaps/jclub2v112/0007.png
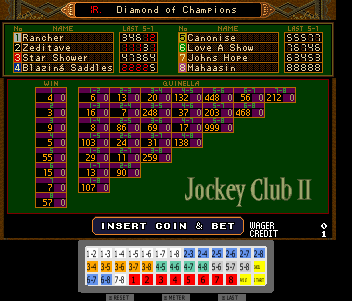
8. Newer Hardware
Finally I moved on to the newer hardware, based on the ST-0032. Basic support
was already present: this chip wants the graphics ram bytes swapped and the
sprite list shuffled around compared to its earlier counterpart.
As 8th step I implemented the rest of the differences e.g. color handling,
video registers in different places, different sprite list stride and
end-marker, tilemap offsets etc. thus bringing the later games on par with
the earlier releases. But they have no sound at the moment, I haven't worked
on that part.
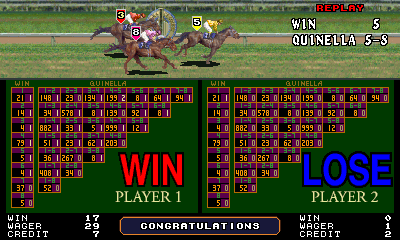
So, there you go, in closing, some shots from the most recent version we
have. Next to the version number is the ID and (encoded) the configuration
identifier and vender code:
http://www.lucaelia.com/images/mame_snaps/jclub2v220/0003.png

http://www.lucaelia.com/mame.php/2017/Jockey-Club-II
--
ポーラステーション
http://perry0517a.blogspot.tw/
--
※ 發信站: 批踢踢實業坊(ptt.cc), 來自: 115.82.130.21
※ 文章網址: https://www.ptt.cc/bbs/Emulator/M.1493734169.A.D69.html
Emulator 近期熱門文章
PTT遊戲區 即時熱門文章
9
12
